Thursday 7 September 2017

THE ART TOOLS RESTORE PROJECT

THE ART TOOLS RESTORE PROJECT

The most used of our tools is our brushes and we happen to replace them every now and then ! and none of us ready wish to part from those creative tools which act like our magic fingers . agreed ?
most of u must have agreed .
 SO , today im on the itsybitsy blog as a GDT and im gona create a salvage project focusing on RESTORING  the much loved brushes .

THE NEW LAUNCHED  , paper crafting melodies (olivia ) and the alchol splashes have been my buddies for the project :P

so without a further ado! lets check out what I created :


OLIVIA AND THE GORGEOUS COLORS 

THE GLORIOUS SPLASH 

THE MOSAIC 


LOVE MY BRUSHES !
TOTALLY TREASURE THESE 


THE COMPLETE PROJECT 


TUTORIAL :

I have a pictorial for u guys to enjoy and try and create something with all the left over or to salvage pieces in ur stash ! " go get creative "


Take a base : i have taken an flat frame 

 using silicon glue , glue down  the mosaic pieces (i have taken broken lamp glass pieces )
 then stick the brushes and any empty tube and allow to completely dry.

guesso the entire layout (2 coats )
now start layering the olivia elements . I also sprinkled some sand for texture. 

a zoomed click 


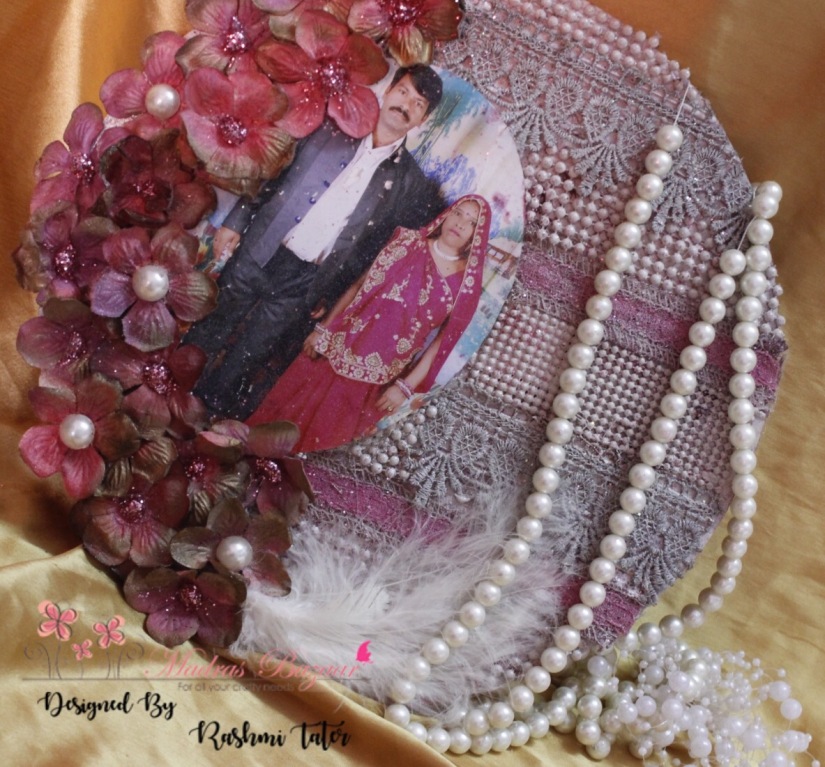
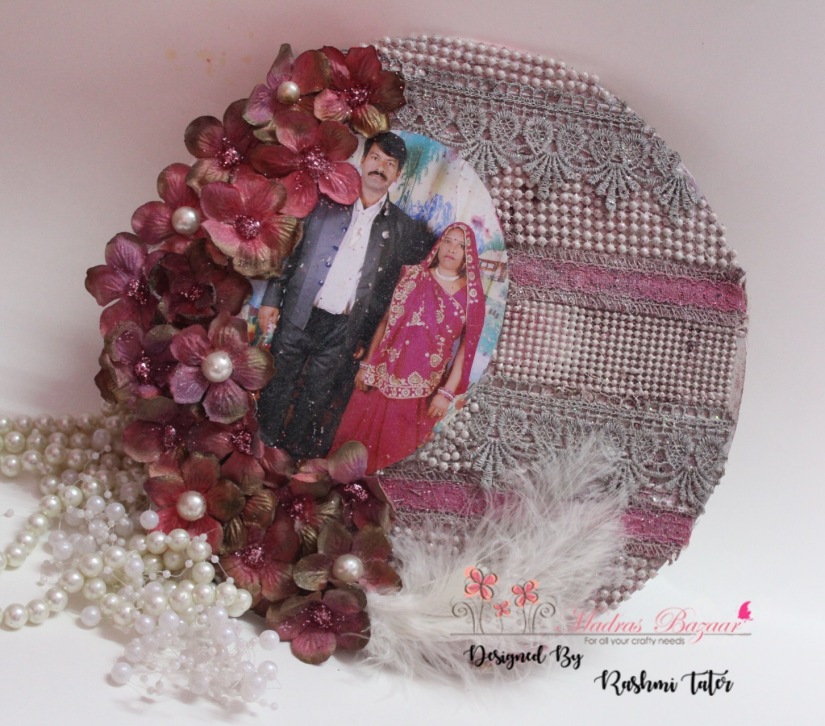
I added pearl lace to all the sides of the frame .AND FEW PEARLS TOO.


guesso it all again . and allow to dry !
now play around  with ur alcholol splash ! and enjoy .


so the supplies :


 Paper Crafting Medley - Olivia 24pcs


Monday 31 July 2017

A VINTAGE CARD

HELLO DEAR FRIENDS!

Wishing u a very warm morning , today I'm on the Madras Bazaar blog sharing my final DT project .

Goodbyes are difficult and leaving good ppl is even more difficult . Its been lovely working with Manisha and team . But my term unfortunately ends here and i didn't wish to waste the opportunity to play with my DT pack thoroughly for the July month , thus I  have lots of projects to inspire u guys with not just one but 2 tutorials and one inspiration card . Hope u guys will enjoy (the long video &post without complaining 😜 ) I  have tried to incorporate lots of techniques in it too. so without further ado ! lets check out what we r gonna create .

a Vintage card layout (mix media style )


love the foil effect !

so if u wish to know how I created this card ,here is the tutorial : 


list of supplies used :


Now lets move to another card i created and this time using the same mermaid glitter and stencil .
its adorned with handmade resins and flowers and lots of feathers ......(I love their soft feel )
this project also features the little hearts.


the angel showering  the hearts <3


all pastel goodness captured 


just love how the mermaid glitter turns an boring large resin tag to gorgeousness


list of supplies used :


now moving to the third project and this is a multi functional project !

it doubles up as a rakhi for a little girl,
a head/belly band for the little girl 

I have used the resin making kit in my DT pack & CREATED THESE CUTIES 
using silicon mold, glitter and the kit .


so now lets check out the tutorial to make this :
wish to check out how the resins were created ?
then here is the link :https://www.youtube.com/watch?v=3Ffxg15YeCM&feature=youtu.be

list of supplies used :


Thank You for dropping by .
so leave some love in the comments <3


LOVE ,
RASHMI .

Friday 28 July 2017

Mixmedia plank photo frame

Wishing u a warm morning !
Today I have an interesting Mixmedia project using the latest release of madras bazaar!  And I have showed few more alternative uses too !
So stay tuned !
 Firstly let’s check out the project we will be doing :
IMG_8792IMG_8797
Next lets hop on to the video tutorial


Now the list of supplies

Sunday 18 June 2017

THE BLOCK BOX card with lace flower


hello dear readers ,
wishing u a bright morning !


I'm on  the blog today to share a new style of card which would be perfect for the last minute gifts as it takes about 30 mins to make ! and looks sturdy and gorgeous with ample of space and pockets for the write ups and pictures!(it has a secret pocket too :P)
so without a further  a do lets check out what we r gona make :)


i used the pearls of different sizes to create dimension on the card front 


so here is the card ! isn't the Dollie perfectly matching the flower !(handmade lace flower , the tutorial also attached below )


birthday blessings for sure  <3

pockets and removable tags and apple space to fill in loads of more tags and pictures 


surprise surprise more space !

hope u like  what u see , so now lets get making !

: PICTORIAL :

STEP 1 : take a cardstock of size 12 inches *10 inches 
and score 12 inches side at 5 1/2 and 6 1/2 inches 
and store the 10 inches side at 7 inches score line 

this way we have a hinge and to cabin blocks , add tacky tape as shown in the picture and stick alog to create pockets .


STEP 2 :repeat it again on a new piece of card stock 


STEP 3 : attach the 2 cards as shown in the picture leaving one side open (op) for the secret pocket 


STEP 4 :you will end up with something like this 


STEP 5 : to one of the side add the tacky tape(this should  be ur front ) and add the lace trim 


STEP 6 : no flip over and stick the green card stock to the back of the card 


STEP 7 :for the top  add the glitter card-stock ,I used the dcwv stack page  for this as it served perfect contrast .
the rest u can add a Dollie and a contrasting flower to finish the cover 


Tutorial to make the lace flower


 I used the lace trim from my stash and layered it on a piece of paper sticking using glue gun  as shown in the pictures to create a double layered flower


tada ! we r done , now add embellishments, pearls, die-cuts from ur stash to make the card more happening :)